
5 Fast and Easy Cooking Demonstration Ideas

Banana Nut Oatmeal
Putting together an engaging and informative cooking demonstration is harder than it seems. You have to be an organizational mastermind with well-tested and delicious recipes, not to mention a solid grasp of the basics of cooking. Your presentation space doesn't do you any favors either, often forcing you to think on your feet and adjust cooking methods as your equipment and location demand. Plus an audience wants to see the finished outcome much faster than it really takes to measure and set everything up. Sound overwhelming? It doesn't have to be with a bit of planning, and we are here to show you how!
Don't worry; our chefs and presenters have wonderful cooking demonstrations under their belts. They've gotten all that work down to a science. In fact, Judy Doherty, PC II and founder of Food and Health Communications, Inc, will share some of her top cooking demonstration guides here today -- everything from planning to execution. All these guides, and many more, are available in the Home Run Cooking Demonstration Book, which is a perfect gift for the registered dietitian (RDN), nutrition consultant, or another health educator in your life. What are you waiting for? Get the book today!
Fast and Easy Demo #1: Banana Nut Oatmeal
Get Ready: A day or two before the demonstration
Read the recipe thoroughly and ensure each step is clear and makes sense to you.
Purchase your ingredients. It’s a good idea to buy several types of oats for a discussion during or after the presentation. I recommend getting at least three types of oats -- instant, rolled, and steel-cut.
Review my warning about cooking with milk. You’ll find it in Judy’s Tips section below.
Explore the health benefits of oats at the Whole Grain Council's website.
Print any handouts or recipes that you want to distribute to the group.
Practice your demonstration a few times. Try to get family or friends to watch you. Also, we are always just an email or phone call away if you need help. Contact us anytime!
Get Set: A few hours before the demo.
Visit your demonstration site and ensure that all equipment is ready.
If your audience is large and you want to provide tastings, you can precook a large batch of oatmeal ahead of time.
Pack up your ingredients and equipment.
Review food safety information to ensure proper temperatures and materials for hand-washing, area cleaning, and sanitizing.
Pre-measure all ingredients and place them in small cups or bags on your demo table. Put them in the order they will go into the recipe, with the first ones closest to you.
Go: During the demo
Introduce yourself.
Introduce your ingredients and talk briefly about any notable ones.
Introduce your cooking equipment and each piece’s role in the recipe.
Outline the process you’re going to use to prepare the oatmeal.
Follow the recipe’s directions and prepare the oatmeal.
During the downtime in your demonstration (or before/after the presentation), you can discuss the different types of oats and their uses. Explain how the different types are processed, when to use each type, and where to buy them.
When the oatmeal is done, be sure to highlight its consistency. It should be creamy and thick.
If you’re distributing samples, do so now and discuss the recipe with participants while they eat.
Judy’s Tips:
I don’t recommend making oatmeal with milk, especially during a cooking demonstration. It overflows easily, and the oats don’t get as creamy. If it is cooked properly, the oatmeal will mix well with a cup of milk and be rich, thick, and delicious.
Avoid recipe disaster: use a larger bowl or saucepan than you think you’ll need. This will help keep the oatmeal from overflowing in the pan.
It is also important to measure the liquid and the oats properly. Remember, rolled oats usually use two parts water to 1 part oats.
Take it Further!
Use the Fooducate app or website to grade various oatmeal products -- from Irish to old-fashioned to instant to oat cookies. This can be a demonstration or a group activity.
Download a few fast-food breakfast nutrition charts and compare the Nutrition Facts of those foods to the Nutrition Facts provided with the recipe. How does the food stack up? Consider calculating the yearly calorie savings that result in replacing fast food with oatmeal.

Breakfast Sandwich
Fast and Easy Demo #2: Breakfast Sandwiches
Get Ready: A day or two before the demonstration
Read the recipe through in its entirety and make sure each step is clear and makes sense to you.
Purchase your ingredients and consider what points you want to discuss. For example, you could grab a few different kinds of ketchup to compare during your demonstration. I recommend getting regular, low-sodium, and sugar-free. You could also pick up a few different types of bread and compare their nutrition information. Look at sodium and sugar content, along with fiber and nutrients.
Prepare for any health lessons you might address. For example, if you decide to compare whole grains and refined grains, consider the following. Whole grains are packed with nutrients, while refined grains only offer a fraction of the nutrition. Unfortunately, whole grains can make foods feel heavy and dense. That’s why I like white whole wheat flour -- it provides the extra nutrients but without the heft of regular whole wheat flour. If you want to discuss this in more depth with your participants, check out my guide to whole grains. It’s also wise to stock up on several flours -- I recommend all-purpose, whole wheat and white whole wheat so that your participants can see and feel the differences and explore the kinds of flours that go into their loaves of bread. Or maybe you would like to review the differences between egg whites and whole eggs instead. If that's the case, then you can discuss the dangers of saturated fats and dietary cholesterol. The Dietary Guidelines for Americans have great guidance on that topic, as do the cholesterol guidelines. You can also pick up several egg substitutes and compare their ingredients.
Print any handouts or recipes that you want to distribute to the group.
Practice your demonstration a few times. Try to get family or friends to watch you and offer feedback.
Get Set: A few hours before the demo.
Visit your demonstration site and ensure that all equipment is ready.
If your audience is large and you want to provide tastings, you can prepare a few batches of sandwiches ahead of time. It would be pretty labor-intensive to make an individual sandwich for each person, especially if you have a large group, so I recommend slicing each sandwich into quarters and serving a quarter to each person.
Pack up your ingredients and equipment.
Pre-measure all ingredients and place them in small cups or bags on your demo table. Put them in the order they will go into the recipe, with the first ones closest to you.
Go: During the demo
Introduce your ingredients and talk briefly about any of the notes.
Introduce your cooking equipment and each piece’s role in the recipe.
Outline the process you’re going to use to prepare the recipe.
Follow the recipe’s directions and prepare the sandwiches.
During the downtime in your demonstration (or before/after the presentation), you can discuss the health/ingredient lesson that makes the most sense with your recipe.
If you’re distributing samples, do so now and discuss the recipe with participants while they eat.
Judy’s Tips:
Avoid recipe disaster: The egg sandwich recipe says to microwave the eggs for 2-3 minutes. Using the microwave at your demonstration site, test a few batches until you figure out exactly how much time you’ll need. Do this testing before your demonstration day.
Try a few egg substitutes before picking one for your demonstration. That way, you can choose the option that is most appealing to you.
Take it Further!
Use the Fooducate app or website to grade various breakfast sandwich ingredients -- from eggs to egg substitutes to bacon. This can be a demonstration or a group activity.
Have participants come up with ideas for healthful toppings for the egg sandwich -- things like fresh slices of cucumber, a dollop of sautéed spinach, etc. Consider laying out a topping bar and letting participants design their own garnishes.

Winter Green Super Soup
Fast and Easy Demo #3: Winter Green Super SoupGet Ready: A day or two before the demonstration
Read the recipe through in its entirety and make sure that each step is clear and makes sense to you.
Gather your equipment. Will you be able to puree the soup on-site? How? Small batches in a blender work well, as does placing an immersion blender right in the pot. A food processor works well too. Practice with these machines so that you look smooth during your demo and so that the soup does not spray everywhere because of a lid that doesn’t fit.
Purchase your ingredients. Any soup demo lends itself well to a discussion of the sodium content of canned soups. Homemade soups are fresh, healthful alternatives. Pick up a couple of cans of different kinds of soup so that you can discuss sodium content during some downtime in the demo.
Print any handouts or recipes that you want to distribute to the group.
Practice your demonstration a few times. Try to get family or friends to watch you and offer feedback.
Get Set: A few hours before the demo
Visit your demonstration site and ensure that all equipment there is ready to go.
If your audience is large and you want to provide tastings, you can precook a large batch of soup ahead of time.
Pack up your ingredients and equipment.
Review food safety information to be sure that you have proper temperatures and materials for hand-washing, area cleaning, and sanitizing.
Pre-measure all ingredients and place them in small cups or bags on your demo table. Put them in the order they will go into the recipe, with the first ones closest to you.
Go: During the demo
Introduce yourself.
Introduce your ingredients and talk briefly about any notable ones.
Introduce your cooking equipment and each piece’s role in the recipe.
Outline the process you’re going to use to prepare the soup.
During the downtime in your demonstration (or before/after the presentation), you can discuss the sodium issue with soup.
When the soup is done, puree it.
If you’re distributing samples, do so now and discuss the recipe with participants while they eat.
Judy's Tips:
The most important variables for soups are the texture and the temperature. Cooking properly will assure a smoothly pureed soup. Test the veggies with a knife or by tasting them to make sure they are soft and ready to puree. Make sure you serve a hot soup hot and a cold soup cold.
Do not be afraid to adjust the consistency with a little more liquid if needed.
Since this soup can take a while to cook, you can also prepare a batch ahead of time (batch A), and then demonstrate the recipe (batch B) during your session, stopping just before you get to the long simmer. At that point, you can reheat and distribute samples from your earlier batch (batch A). If you don't want to miss demonstrating how to puree the soup, then you could leave your first batch of soup (batch A) un-pureed. You could demonstrate how to make the soup up until the long simmer (batch B), then reveal your first batch (batch A) and run it through your blender, immersion blender, or food processor before distributing it as samples.
Take it Further!
Use the Fooducate app or website to grade various canned and prepared soups. This can be a demonstration or a group activity.
Garnishes can also make or break a soup. Brainstorm healthful topping ideas as a group, and consider bringing some options to class ahead of time.
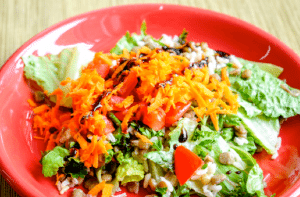
Carrot Ginger Salad
Fast and Easy Demo #4: Carrot Ginger SaladGet Ready: A day or two before the demonstration
Read the recipe through in its entirety and make sure that each step is clear and makes sense to you.
Print any handouts or recipes that you want to distribute to the group.
Practice your demonstration a few times. Try to get family or friends to watch you.
Get Set: A few hours before the demo
Visit your demonstration site and ensure that all equipment there is ready to go.
If your audience is large and you want to provide tastings, you can assemble a few batches of salad ahead of time -- just don't dress them until right before you serve them.
Pack up your ingredients and equipment.
Review food safety information to be sure that you have proper temperatures and materials for hand-washing, area cleaning, and sanitizing.
Pre-measure all ingredients and place them in small cups or bags on your demo table. Put them in the order they will go into the recipe, with the first ones closest to you.
Go: During the demo
Introduce yourself.
Introduce your ingredients and talk briefly about any notable ones. The ginger is usually worth drawing attention to, since it is a bit more exotic and plays such a vital role in the recipe.
Introduce your cooking equipment and each piece’s role in the recipe.
Outline the process you’re going to use to prepare the salad.
Follow the recipe’s directions and prepare the salad.
If you’re distributing samples, do so when the salad is done and discuss the recipe with participants while they eat.
Judy’s Tips:
One of the biggest salad disasters happens when ingredients are not fresh or crisp. Make sure you have a way to keep your ingredients cold and fresh. Don’t toss salads too far in advance before serving or the vinegar will break down the vegetables and they will taste soggy.
Make sure that the lettuce is thoroughly washed and dried -- consider using a lettuce spinner to help this process along. You can walk your participants through how to use a lettuce spinner at the demonstration, if you'd like.
Take it Farther!
Use the Fooducate app or website to grade salad ingredients. Which are healthful? Which are too calorie dense? This can be a demonstration or a group activity.
Discuss plating the salad and making great presentations. View the color photos in the eBook PDF file to see our presentations for ideas. You can also review the guide to 12 different salad presentations.

Cherry Apple Skillet Pie
Fast and Easy Demo #5: Cherry Apple Skillet PieGet Ready: A day or two before the demonstration
Read the recipe through in its entirety and make sure that each step is clear and makes sense to you.
Purchase your ingredients.
Print any handouts or recipes that you want to distribute to the group.
Practice your demonstration a few times. Try to get family or friends to watch you.
Get Set: A few hours before the demo
Visit your demonstration site and ensure that all equipment there is ready to go.
If your audience is large and you want to provide tastings, you can precook a few skillet pies ahead of time.
Pack up your ingredients and equipment.
Review food safety information to be sure that you have proper temperatures and materials for hand-washing, area cleaning, and sanitizing.
Pre-measure all ingredients and place them in small cups or bags on your demo table. Put them in the order they will go into the recipe, with the first ones closest to you.
Go: During the demo
Introduce yourself.
Introduce your ingredients and talk briefly about any notable ones.
Introduce your cooking equipment and each piece’s role in the recipe. This is a great opportunity to review different types of skillets -- non-stick, cast iron, etc. Take a minute or two to discuss the drawbacks and benefits of each one.
Outline the process you’re going to use to prepare the pie.
Follow the recipe’s directions and prepare the pie.
If you’re distributing samples, do so when the pie is done and discuss the recipe with participants while they eat.
Judy’s Tips:
Many different brands make fat-free pancake batter. Pick up a couple and figure out which ones you like best.
You can also use fresh cherries in this recipe, but it gets labor intensive if you don’t have a cherry pitter.
Take it Farther!
Use the Fooducate app or website to grade prepared pies. How does this pie compare? This can be a demonstration or a group activity.
It's fun to have a few different dishes or glasses to show different ways to serve your pie. Or you can also use an entree plate and do a session on garnishes.
Like what you see? Get even more amazing resources with the full Home Run Cooking Demonstration Program. Pick up your copy today, become a member, or browse the Nutrition Education Store for other wonderful book options.